
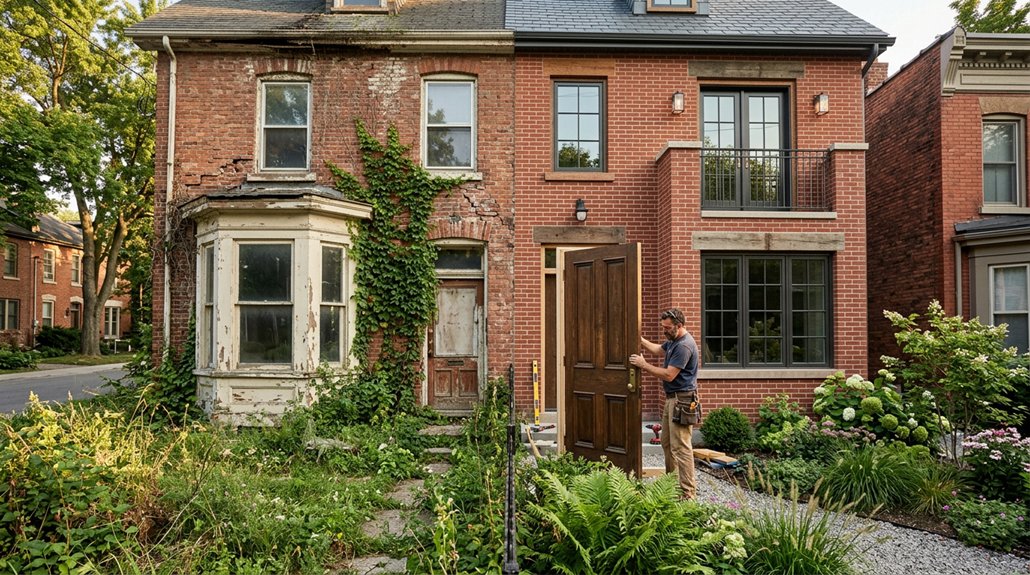
A neglected property can hide structural damage, unsafe wiring, failed plumbing, and moisture problems beneath cosmetic wear. Before you choose finishes or set a renovation budget, inspect the building and identify the repairs that protect its occupants and prevent further damage. Then match upgrades to your plans, local code requirements, and available funds. One overlooked defect can change the entire project—so start by finding out what the property is concealing.
Inspect the Property Before You Set Priorities
Before setting renovation priorities, inspect the property systematically, starting outside and working inward. From a safe distance, check the roofline, chimneys, gutters, siding, grading, and visible foundation cracks. Don’t climb unstable ladders or enter areas with sagging structures, exposed wiring, or suspected asbestos; arrange qualified inspections instead.
Next, assess interior rooms for water stains, musty odors, soft floors, damaged framing, and unsafe electrical or plumbing conditions. Photograph defects, note their locations, and record when you observe them. Test doors and windows for operation, but don’t disturb materials that may contain lead or other hazards.
A Neighborhood assessment can reveal drainage patterns, nearby construction, access constraints, and comparable property conditions. Combine documented findings with a professional evaluation to support Property valuation. This evidence helps you set informed priorities without overlooking hidden risks.
Build a Renovation Budget Around Essential Repairs
Once the inspection findings are documented, build your budget around repairs that protect people and prevent further damage. Separate urgent safety work from improvements that can wait, and assign each item a realistic cost range. Include permits, inspections, debris removal, temporary protection, and a contingency for concealed conditions.
Get written estimates from qualified, insured contractors, then compare their scopes—not just their totals. Keep receipts and inspection records to support insurance claims and future property valuation.
Check whether renovation financing covers required repairs, and confirm draw schedules, interest costs, and lender conditions before committing. Reserve funds for unexpected hazards rather than spending the full amount on finishes.
If your available budget falls short, phase noncritical work and avoid occupying areas until hazards are controlled. Review costs regularly, document changes, and approve extras only after you understand their safety impact.
Fix Structural Problems and Failing Systems First
Before cosmetic work, inspect the foundation, framing, roof, and load-bearing walls for damage that could compromise stability.
Hire qualified professionals to assess hazards and repair structural defects safely.
Replace failing electrical, plumbing, and HVAC systems before they cause further damage or create safety risks.
Repair Structural Damage
Why prioritize structural repairs? You need a safe, stable shell before improving finishes. Start with a qualified engineer’s load bearing assessment to identify compromised beams, joists, walls, and connections.
Check for sagging floors, widening cracks, water-damaged framing, and shifting masonry; document changes and restrict access where failure seems possible.
For foundation stability, investigate settlement, heaving, and drainage patterns rather than patching visible cracks alone. Ask a structural professional to specify repairs, materials, temporary supports, and inspection points.
Follow permits and local codes, and don’t remove or alter a load-bearing element without an approved plan. Use licensed contractors for hazardous work, including shoring and masonry repairs.
After repairs, obtain required inspections and keep reports, photos, and warranties. This evidence helps you verify the structure’s condition before proceeding with cosmetic renovations.
Replace Failing Systems
After structural repairs, replace failing electrical, plumbing, heating, and ventilation systems before finishing walls or floors. Have licensed professionals inspect wiring, panels, pipes, and equipment; don’t energize damaged circuits or use corroded lines. Ask your electrician to size circuits for expected loads, install required protection, and verify grounding.
Schedule Plumbing repairs to address leaks, unsafe materials, poor drainage, and inadequate water pressure.
For HVAC upgrades, calculate heating and cooling loads, check duct condition, and provide proper ventilation and combustion-air clearances. Confirm that new systems meet local codes and manufacturer specifications.
Test each installation, document permits, and correct failed inspections before closing access panels. If you’re coordinating contractors, sequence rough-ins together, photograph concealed work, and keep utilities isolated until qualified tradespeople approve safe operation. This prevents hidden defects and costly rework.
Improve Energy Efficiency Without Overspending
Once structural and system hazards are addressed, use an energy audit to identify costly air leaks.
Seal gaps with materials suited to each location, keeping vents and combustion-air pathways clear.
Then choose efficient upgrades based on measured needs, safety requirements, and payback.
Seal Air Leaks
Air leaks can waste energy and let moisture into a neglected property, so seal them before investing in costly upgrades. You’ll improve comfort and limit air infiltration by checking window and door frames, attic hatches, plumbing penetrations, and gaps where walls meet floors.
On a windy day, feel for moving air or use a smoke pencil; keep smoke away from flames and shut off combustion appliances before testing nearby areas.
Choose sealant to match each gap: apply caulk to narrow, stationary joints and low-expansion foam around larger openings. Install weatherstripping on movable doors and windows, ensuring they still close and latch securely.
Don’t block vents, drainage paths, or required combustion-air openings. Wear gloves and eye protection, follow product labels, and ventilate work areas.
After sealing, inspect for remaining drafts; targeted draft reduction can lower heating and cooling losses without major expense.
Choose Efficient Upgrades
With drafts sealed, prioritize upgrades by energy use, condition, and payback rather than replacing everything at once. Review utility bills and inspect insulation, windows, heating equipment, and water heaters. Fix safety hazards and failing components before pursuing efficiency gains; have a licensed technician assess combustion appliances, wiring, and ventilation.
Choose upgrades that fit your climate and budget. Add attic insulation where appropriate, install efficient lighting, or replace an aging heat pump with a correctly sized model. Compare total costs, expected savings, warranties, and available rebates before committing.
Smart technology, such as programmable thermostats, can reduce wasted heating and cooling, but confirm compatibility and set safe temperatures.
Select durable, eco-friendly materials with verified performance ratings. Stage projects so each improvement supports the next, and measure energy use afterward.
Don’t seal combustion-air openings or obstruct required ventilation; follow local codes and manufacturer instructions throughout installation.
Refresh Neglected Rooms With Durable Finishes
Before applying finishes, inspect neglected rooms for leaks, mold, loose plaster, and damaged wiring, and fix these hazards rather than covering them up. Wear gloves, eye protection, and a respirator when removing debris; isolate power before electrical repairs. Let damp materials dry fully, then prime sound, clean surfaces with products suited to their substrates.
| Surface | Durable finish |
|---|---|
| Walls | Scrubbable, low-VOC paint |
| Floors | Sealed tile or resilient flooring |
Choose washable coatings in high-traffic areas and moisture-resistant finishes near sinks. Follow manufacturer instructions for ventilation, temperature, curing time, and compatible primers. Don’t paint over active mold or unstable plaster; call qualified professionals when repairs exceed your skills. Add Decorative accents only after coatings cure. These aesthetic enhancements should remain easy to clean and shouldn’t conceal cracks, stains, or other signs of damage.
Choose Renovations That Fit Your Plans for the Property
Choose upgrades based on how you’ll use the property, how long you’ll keep it, and your budget. If you plan to rent, prioritize code-compliant kitchens, bathrooms, secure entry points, and durable mechanical systems.
For a future sale, focus on improvements that support function and curb appeal without overbuilding for the neighborhood. If you’ll occupy the home, tailor layouts and accessibility features to your household’s needs.
Before altering an older property, check local rules for Historical preservation. Retain protected materials and consult qualified specialists when work affects original structures.
Landscaping enhancements can improve drainage, reduce erosion, and create safer paths. Grade soil away from foundations and keep plants clear of service equipment.
Match each project to a defined use, expected maintenance, and available funds. Confirm that planned changes meet applicable building, fire, and accessibility requirements before work begins.
Avoid Common Delays and Costly Renovation Mistakes
Control renovation delays by resolving hidden hazards and scope gaps before crews begin work. Hire qualified inspectors to check for asbestos, lead paint, faulty wiring, leaks, and structural damage; don’t let workers disturb suspect materials until specialists assess them.
Confirm permits, utility shutoffs, and inspection schedules with local authorities, then document approvals.
Build a written scope with measurements, product specifications, responsibilities, and change-order procedures.
Order long-lead materials early, verify deliveries, and keep a contingency fund for concealed damage.
Coordinate trades in sequence so demolition, rough-ins, inspections, and finishes don’t conflict.
Protect occupied areas with dust barriers and safe access routes.
Review Design aesthetics alongside code requirements, not at the last minute.
Schedule landscaping improvements after heavy equipment leaves, and confirm drainage won’t direct water toward foundations.
Track costs and decisions weekly.
Frequently Asked Questions
Do I Need Permits for Renovating a Neglected Property?
Yes, you’ll likely need permits for renovations involving structural changes, electrical or plumbing work, roofing, or major repairs.
Ironically, neglected properties often demand the most paperwork before you can make them safer.
Check local building codes and zoning regulations, since requirements vary by location and project scope.
Contact your building department before starting, and ask whether inspections or specialist plans are required.
Unpermitted work can create safety risks, fines, and resale problems.
Should I Hire a General Contractor or Manage the Renovation Myself?
Hire a general contractor if your neglected property needs structural repairs, major electrical or plumbing work, or multiple trades. You’ll gain coordinated scheduling, code compliance, and clearer safety oversight.
Manage the renovation yourself only if you have relevant experience, time, and reliable licensed specialists. Assess DIY challenges, including hidden damage, permit requirements, and hazardous materials.
During contractor selection, verify licenses, insurance, references, written scope, and payment terms. Don’t start work until required permits are approved.
How Can I Find Reliable Contractors for a Renovation Project?
Start your contractor search with careful checks and clear criteria. Use Contractor vetting to verify licenses, insurance, references, and relevant renovation experience.
Request itemized bids, compare timelines and payment schedules, and confirm who’ll obtain permits and coordinate inspections.
For a Reliability assessment, contact recent clients and ask about workmanship, communication, change orders, and cleanup.
Check complaints with local licensing agencies.
Don’t pay large sums upfront; use a written contract that defines safety requirements, scope, milestones, and warranties.
Are Renovation Expenses Eligible for Tax Deductions or Credits?
Your renovation expenses may qualify for tax credits or deductions, but ordinary home improvements usually don’t. Tax incentives often cover specific energy upgrades, accessibility modifications, or improvements to rental or business properties.
Deduction eligibility depends on your location, property use, project type, and current rules. Keep invoices, permits, and contractor certifications, and verify equipment meets program standards.
Before work begins, check official tax guidance or consult a qualified tax professional to avoid unsafe assumptions and missed deadlines.
Can I Live in the Property While Renovations Are Underway?
Yes, you can live in the property during renovations if the work area is safely separated and essential services remain reliable.
Before moving in, ask your contractor to assess hazards, including exposed wiring, dust, lead, asbestos, and blocked exits.
Confirm local permits and occupancy rules, and agree on a renovation timeline with clear access restrictions.
If conditions become unsafe, arrange temporary occupancy elsewhere until the contractor confirms the home is safe.
Leave a Reply