
A renovation gives you a chance to reduce energy waste while improving comfort and safety. Start with a professional energy audit to locate air leaks, insulation gaps, and inefficient equipment before choosing upgrades. Sealing drafts, improving insulation, and selecting efficient windows, HVAC systems, and water heaters can lower energy use, but each change must suit your home’s structure and ventilation needs. The right order matters—and some improvements deliver far greater savings than others.
Start With a Home Energy Audit
Before choosing upgrades, get a professional home energy audit to identify where your home loses energy and which improvements will deliver the greatest savings. An auditor can review your utility bills, inspect heating and cooling equipment, and perform an energy consumption analysis to establish a baseline.
You’ll learn which systems use the most power and whether equipment needs repair, replacement, or better controls. Ask for prioritized recommendations with estimated costs, savings, and payback periods so you can coordinate work with your renovation budget.
Request combustion-safety checks if your home has fuel-burning appliances; faulty equipment can expose you to carbon monoxide. Share the findings with your contractor before ordering materials or changing systems.
Keep the report and test results, then compare future energy use against the baseline to confirm that completed upgrades perform as expected.
Seal Drafts and Air Leaks
Use a smoke pencil or infrared camera to locate hidden leaks around windows, doors, outlets, and utility penetrations.
Seal small gaps with caulk and larger openings with compatible foam, keeping materials clear of heat sources and ventilation openings.
Wear gloves and eye protection, and follow product instructions.
Find Hidden Air Leaks
Hidden air leaks can waste energy and make rooms uncomfortable, even when you can’t feel a draft. During renovation, inspect likely pathways before walls or ceilings close.
Check around plumbing and wiring penetrations, recessed lights, attic hatches, and connections between living areas and unconditioned spaces. An attic inspection can reveal gaps in insulation, disconnected ducts, or airflow paths around framing.
Use a smoke pencil or infrared camera to locate leaks; don’t use an open flame, especially near insulation or combustible materials.
Ask a qualified contractor to perform a blower-door test if leaks remain difficult to find. Confirm that combustion appliances vent safely before and after air sealing, since reducing uncontrolled airflow can affect their operation.
Include duct sealing in your renovation plan, and have ducts tested for leakage. Record findings so your crew can address them before finishes conceal access points.
Seal Gaps and Cracks
Once you’ve located air leaks, seal them with materials suited to the gap and its surroundings. Apply weather stripping to movable parts, such as doors and operable windows, so they close tightly without sticking. Choose a durable product rated for the surface and expected exposure.
For stationary joints around trim, baseboards, and window frames, use caulk; reserve expanding foam for larger, concealed openings where it won’t obstruct drainage or moving components.
Before caulk application, clean and dry the surface, then follow the manufacturer’s temperature and curing instructions. Wear gloves and eye protection, and ventilate the area, especially when using solvents or foam.
Don’t seal intentional vents, weep holes, or combustion-air openings. If a leak surrounds a flue or electrical equipment, consult a qualified professional before sealing it.
Inspect repairs after curing and replace compressed or damaged seals.
Upgrade Insulation for Year-Round Comfort
How well does your home retain heat in winter and cool air in summer? During renovation, inspect attic, wall, and floor insulation before adding material. Check local energy codes and choose an insulation type and R-value suited to your climate and building assembly. Properly installed thermal barriers slow heat transfer, helping stabilize indoor temperatures and reduce heating and cooling demand.
Address moisture control before closing cavities. Repair leaks, confirm drainage, and assess ventilation; trapped water can damage framing and reduce insulation performance. If you find mold, pest activity, or damp materials, resolve the cause and consult a qualified professional before proceeding.
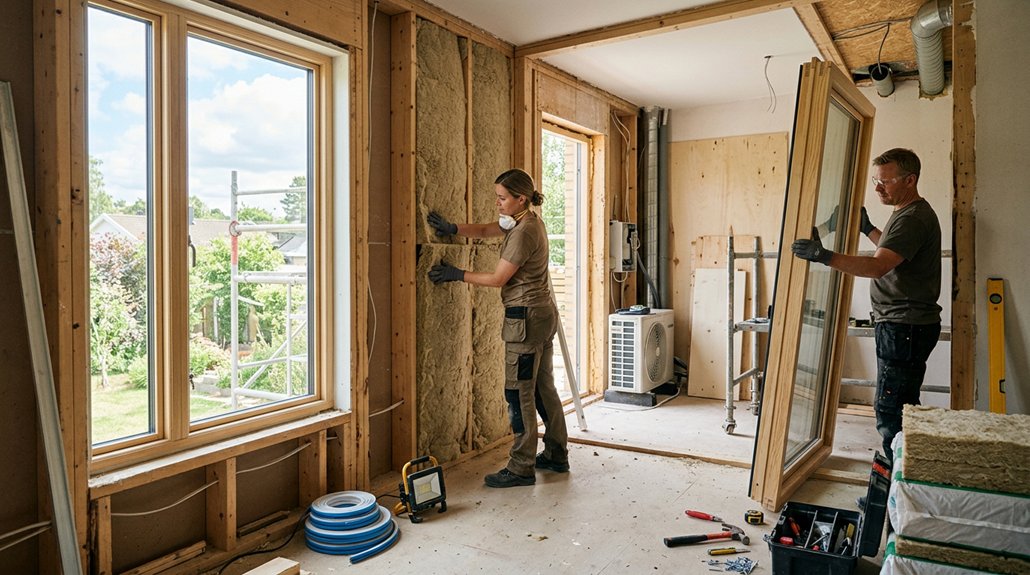
Wear gloves, eye protection, and a respirator when handling fibers, and keep insulation clear of heat-producing fixtures unless rated for contact. Seal and support materials without compressing them, since compression lowers effectiveness. Verify coverage and ventilation paths before finishing walls or ceilings.
Choose Energy-Efficient Windows and Doors
After improving insulation, assess windows and doors for drafts, heat loss, and poor solar control. Check seals, glazing, and window frames for gaps, condensation, rot, or damage.
Replace single-pane units with double- or triple-glazed models suited to your climate, and choose low-emissivity coatings to limit unwanted heat transfer. Select frames with effective thermal breaks; compare whole-window ratings, not glass alone.
For doors, inspect thresholds, weatherstripping, and door insulation, then repair or replace components that leak air. Choose a well-sealed, insulated exterior door with glazing appropriate to its exposure.
Before work, confirm rough-opening dimensions and follow manufacturer instructions. Wear eye protection and gloves when removing old units, and use a qualified installer for heavy glazing or structural repairs.
Seal perimeter joints with compatible materials to prevent moisture intrusion and preserve performance.
Install Efficient Heating and Cooling
Choose heating and cooling equipment sized for your home’s heating and cooling loads, not simply the capacity of the old system. Ask a qualified contractor to calculate those loads and compare efficient models, including heat pumps, that suit your climate and existing electrical service.
Oversized equipment can cycle frequently, wasting energy and increasing wear; undersized equipment may struggle to maintain comfort.
Seal and insulate ducts in unconditioned spaces, and verify airflow and refrigerant charge during commissioning.
Add smart thermostats to create schedules that match your routine, but keep settings within manufacturer guidance to avoid unnecessary strain.
Consider zone heating with compatible equipment and controls so you can condition occupied areas without overheating unused rooms.
Have a licensed professional handle fuel lines, electrical connections, and combustion equipment, then test safety controls before you use the system.
Improve Ventilation and Indoor Air Quality
As you tighten a home during renovation, plan ventilation to remove moisture and indoor pollutants without wasting conditioned air. Install a balanced mechanical system, such as an energy recovery ventilator, sized for your home and sealed ductwork. Provide exhaust ventilation in kitchens and bathrooms, and vent outdoors—not into attics or wall cavities. Use controls that run fans when needed, but don’t rely on open windows for consistent air exchange.
For humidity control, monitor indoor levels and address leaks promptly; excess moisture can encourage mold, while overly dry air can cause discomfort. Choose low-emission paints, adhesives, and finishes to reduce pollutant sources.
A portable air purifying unit with a properly sized HEPA filter can capture particles, but it won’t remove gases or replace ventilation. Follow equipment instructions, and have combustion appliances and exhaust systems checked for safe operation.
Choose Efficient Water Heaters and Fixtures
Hot water efficiency depends on both the heater and the fixtures that deliver it. During renovation, compare high-efficiency storage heaters with tankless systems, accounting for fuel, household demand, venting, and available space. Have a licensed professional size and install the unit; improper gas connections or venting can cause fire or carbon monoxide exposure.
| Upgrade | What to check | Practical benefit |
|---|---|---|
| Storage heater | Uniform Energy Factor | Lower standby losses |
| Tankless systems | Flow capacity and venting | Heat water on demand |
| Low flow fixtures | Certified flow rate | Reduce hot-water use |
Choose low flow fixtures that maintain useful pressure, and confirm compatibility with your heater. Insulate accessible hot-water pipes, keep required clearances around equipment, and install or test temperature controls to reduce scald risk. Follow manufacturer instructions and local code for every connection.
Select Energy-Saving Appliances and Lighting
Choose appliances with high efficiency ratings and confirm their electrical requirements match your circuits.
Install appropriately rated LED fixtures, and switch off power at the breaker before wiring.
Add smart controls to schedule lighting and appliance use, following manufacturer instructions and electrical codes.
Choose Efficient Appliances
When you replace appliances during a renovation, compare their energy use—not just their purchase price. Check appliance energy ratings and estimated annual consumption to compare models with similar capacity and features.
Smart appliance selection means matching each unit to your household’s actual needs; an oversized refrigerator or washer can waste energy and space. Consider efficient models with heat-pump technology where suitable, and verify that the appliance fits your electrical circuit, water supply, ventilation, and available clearances.
Before installation, confirm the manufacturer’s requirements and local code. Have a qualified electrician assess circuit capacity before adding high-load equipment, and don’t use adapters or extension cords as permanent connections.
Seal and insulate nearby service openings without blocking required airflow. Keep manuals and warranty details, then set efficient operating modes and maintain filters, coils, and seals as directed.
Install LED Lighting
As you plan your lighting, replace frequently used bulbs with LEDs to reduce electricity use and heat. LEDs use less power than incandescent lamps and last longer, so you’ll replace them less often. These LED lighting benefits can lower operating costs and reduce waste.
Choose energy efficient bulbs with the right brightness, measured in lumens, and a color temperature suited to each room. Check the package for dimmer compatibility and confirm the bulb’s shape and base fit your fixtures.
Before installation, switch off the circuit at the breaker, let hot bulbs cool, and follow the manufacturer’s instructions. Don’t exceed a fixture’s rated wattage, and use damp-location or enclosed-fixture-rated LEDs where required.
If a fixture shows damaged wiring or loose connections, have a qualified electrician repair it before use.
Use Smart Controls
Smart controls can reduce energy use by adjusting lighting and appliances to match your routine. During renovation, choose smart thermostats that support your heating and cooling system, then program schedules around occupancy. Set reasonable temperatures and use geofencing only if you’re comfortable sharing location data.
Automated lighting can switch off in empty rooms, dim lights when daylight is sufficient, and follow reliable schedules. Pair controls with efficient appliances that offer energy-monitoring features, so you can identify standby loads and adjust usage.
Before installation, verify device ratings, wiring requirements, and network compatibility. Turn off power at the breaker before handling wiring, and hire a licensed electrician for line-voltage controls or uncertain connections.
Secure your network with strong, unique passwords, install firmware updates, and keep manual switches accessible for safe operation during outages or device failures.
Prioritize Upgrades by Cost and Energy Savings
Which upgrades will deliver the greatest energy savings for your budget? Start with a cost analysis that compares installation price, expected energy savings, maintenance, and equipment life. Use utility bills, an energy audit, and contractor estimates to identify costly heat loss or inefficient systems.
Air sealing and insulation often offer strong returns, while replacing an aging furnace or water heater may make sense when repairs are frequent. Check local rebates and incentives before you set priorities.
Don’t overlook safety. Have a qualified professional inspect combustion appliances, venting, wiring, and moisture risks before upgrades begin. Never seal a home without confirming adequate ventilation and safe operation of fuel-burning equipment.
Rank projects by payback, comfort, and risk, then coordinate work with planned renovations to avoid paying twice for labor or finishes. Reassess savings after completion.
Frequently Asked Questions
Are Energy-Efficient Renovation Upgrades Eligible for Tax Credits or Rebates?
Yes—your energy-efficient renovation upgrades may qualify for tax credits or rebates, but the details can change what you receive. Tax incentive programs often cover eligible improvements, such as insulation, heat pumps, or efficient windows, subject to current rules and limits.
Check rebate eligibility with your utility, state agency, and tax authority before purchasing. Keep receipts and product certifications, and use licensed installers where required; safe installation protects your home and claim.
Do Energy-Efficient Renovations Increase a Home’s Resale Value?
Yes, energy-efficient renovations can increase your home’s resale value, especially when you document lower utility costs and completed work.
Prioritize Insulation improvements, efficient heating and cooling, and Smart technology that buyers can operate easily.
Choose upgrades suited to your climate and local market; not every project returns its full cost.
Use qualified contractors for electrical or combustion-system work, and keep permits, warranties, and energy assessments ready so you can substantiate performance and reassure buyers during inspections.
Should I Hire a Certified Energy-Efficiency Contractor?
Yes, you should hire a certified energy-efficiency contractor, especially if your renovation involves complex systems or safety risks. The idea that certification guarantees better results isn’t automatically true; verify the contractor’s credentials, references, insurance, and proposed testing methods.
A qualified professional can identify air leaks, recommend insulation improvements and window upgrades, and assess ventilation needs.
Ask for a written scope, expected energy savings, and safety procedures before work begins, then compare bids carefully.
Can I Renovate for Energy Efficiency While Living in My Home?
Yes, you can renovate for energy efficiency while living at home, but plan work in phases. Schedule HVAC upgrades and window replacements room by room, and ask contractors to isolate work areas with barriers.
Keep clear access to exits, smoke alarms, and essential utilities. Ventilate safely, especially during painting or insulation work, and follow product instructions.
If crews must shut off heating, cooling, water, or power, arrange temporary alternatives before work begins.
How Can I Verify That Completed Upgrades Are Performing as Expected?
Verify completed upgrades by comparing post-project energy use with a weather-adjusted baseline. Then confirm each system operates as specified.
Use performance monitoring tools, such as smart meters, thermostats, and equipment diagnostics, to track consumption and runtime.
For upgrade verification, request commissioning records, test results, and warranty documents from your contractor.
Check for drafts, leaks, unusual noises, or alarms, but don’t open electrical panels or service equipment yourself; call a qualified professional if readings seem unsafe or inconsistent.
Leave a Reply